Hi @meed96, thank you passing by and taking the time to make all the questions.
I always wanted to extend the support for other 3d software, there are some wallpapers made in Maya by iCorpus, some rendered with Kerkythea by LockRikard but the majority are made in cinema 4d. I guess it is easier to a new user to find tutorials and minecraft related content to use with this software, also the old wallpaper template tutorial focused more in the details of this software and the new tutorial was build to automate even more the process using c4d.
But there is nothing preventing other softwares to be used to create wallpapers. I did some research with blender and added a few footnotes in the tutorial on how to use blender.
Basically those images backgroundxxx and layerxxx are cinema4d specific, and I made the wallpaper test work with the same format. But for Blender we can have a completely different and new approach that take advantage of the Blender way of doing things.
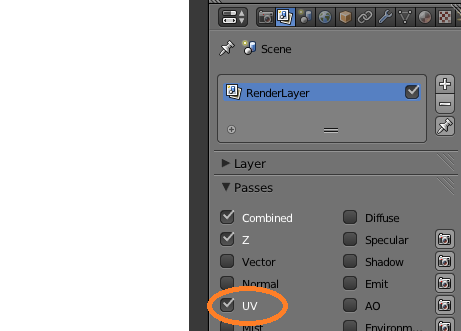
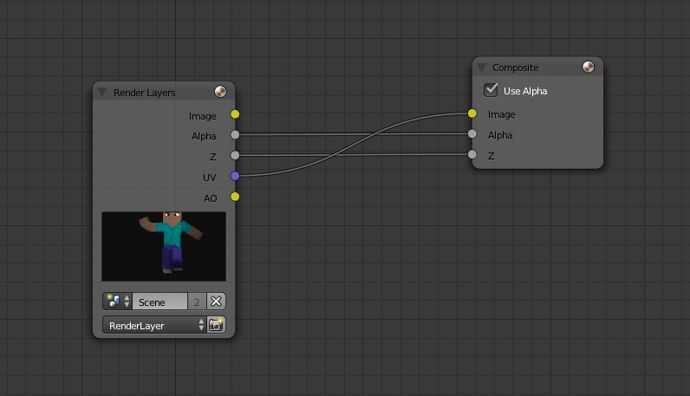
What I need is the UV map of the render. The UV pass exposes how the texture was mapped in the 3d object. If we export this intermediary pass we can later on use this information to remap the rendered image and replace the textures with different images. You can export the uv pass using the blender compositor.
- background0000.png you can skip this image in blender.
- in c4d it is an overlay rendered with fancy settings where the players are transparent.
- background0001.png the background that wil be used. Player rendered with the second layer (hat) disabled.
- layer_object_1_0001.png - a mask for the player objects. The texture replacement will only take effect where this mask tells it to. We only want to replace the player skin, so we need to highlight the player area.
- I found a tutorial on blender object index, that is what you need.
- group the players using this object index and export the black/white image.
- layer_object_1_0001.png same thing, but highlights only the hat.
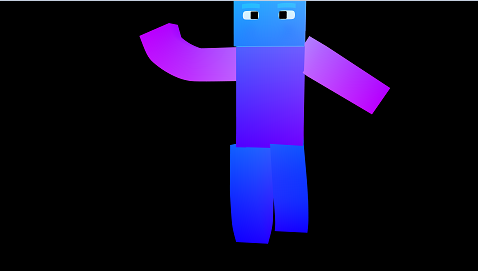
- layer_matcolor0001.png this is the UV map, you don’t need to use that skin, just export the uv map using render passes. The name is matcolor because I use a hack to get the UV map using a special skin because the cinema 4d UV render pass does not work 100%.
- layer_matcolor0001.png same thing, but rendered with the hat enabled. You may need to use a skin with a full filled hat, not transparent.
- layer_illum0001 this is the light and shadows:
- You can use a full white skin for the players, just copy the background image and rename to illumxxx.
- This is where from we extract the light intensity and the light color for a pixel in the player, we get the skin color using the UV pass, but we need to adapt the color to the scene lights, make it darker in shadowed areas for example. If you do not provide this image the player will have no shadows.
- layer_ao0001.png - it is optional just because the wallpaper will work without it, but will look uglier without it, in cinema4d the layer_illum contains only the lights and shadows, ao0001 contains only the ambient occlusion. Internally both layers are combined, using a multiply operation, just like adding one layers in photoshop as multiply.
- if you get the layer_illum copying the background, it will contain the ambient occlusion, so you do not need to export it.
About the save for web, for some reason, when novaskin read the pixels colors of the image, they are read wrong and this will result in misaligned textures. You need to save the image for web because this way the image will use a web safe color profile. I don’t know how blender save images, maybe they use a compatible color profile and you don’t need to take this step.